
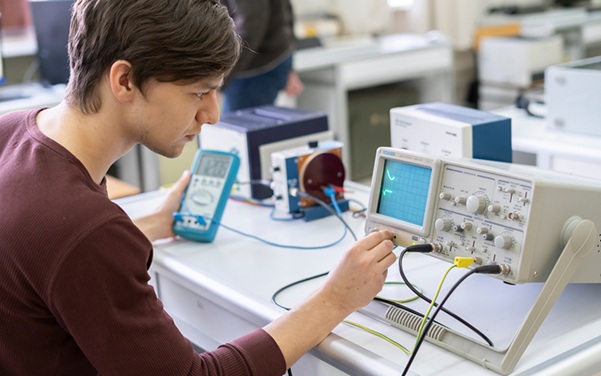
Time-sensitive diagnostics demand more than quick thinking, they require fast and accurate tools. Engineers working under tight timelines know that signal analysis can’t afford delays caused by clunky setups or misconfigured gear. Enter the digitizer: an essential component for high-speed signal capture and waveform analysis. When integrated correctly, it streamlines the entire measurement process, allowing faster results without compromising accuracy.
Here’s a structured guide to achieving faster and more reliable measurements using a digitizer without sacrificing quality or making costly missteps.
Define What You’re Measuring Before Connecting Anything
Rushing into signal capture without first specifying the test objective is a mistake that eats into both time and accuracy. Before touching the equipment, confirm the type of signal, expected frequency range, amplitude, and noise sensitivity. These basics determine the bandwidth, sample rate and resolution your digitizer must support. Skipping this step often leads to mismatched configurations and unnecessary retesting.
Choose the Right Digitizer for the Job
All digitizers aren’t created equal. Some prioritise high-speed data acquisition, while others focus on precision or multi-channel inputs. Select a model that aligns with the nature of your test, don’t over-invest in features that won’t be used. For instance, RF signals need very different specs from low-speed biomedical waveforms. Matching the digitizer to your needs saves setup time and avoids trial-and-error calibration.
Keep Signal Integrity Front and Centre
Poor signal quality is one of the main reasons for repeat testing. Ensure high-quality coaxial or shielded cables were used, and minimise connector transitions. The fewer the conversions between BNC, SMA or other formats, the less signal distortion creeps in. Also, be conscious of grounding: a floating or improperly grounded system introduces noise and instability.
Set Sample Rates According to Signal Complexity
Sampling too slowly means missing details, while excessive rates overload your system with unnecessary data. A general rule is to sample at least 10 times the highest frequency of interest, though the Nyquist rate (twice the frequency) is the bare minimum. Some digitizers offer variable sample rates per channel, use this feature strategically to optimise speed and efficiency.
Configure Triggering to Capture Only What Matters
Misconfigured triggering wastes time and storage. Use edge, pulse width or pattern triggers to isolate relevant signal events and ignore idle states. Advanced digitizers allow segmented memory triggering: this lets you capture multiple events without restarting the acquisition each time. Set up intelligent triggers before running tests to eliminate the need for manual sorting post-capture.
Use Averaging and Filtering Sparingly
While averaging and digital filters clean up noisy signals, overdoing it can mask real faults or delay data processing. If the waveform appears unnaturally smooth, check if averaging is suppressing variation that matters. Use these tools in moderation, aim for clarity, not artificial perfection.
ALSO READ: Understanding Clock Jitter: Causes and Effects in Electronics
Monitor Memory Usage in Real-Time
Long captures at high resolutions eat up memory fast. Watch buffer sizes and acquisition length, some digitizers allow pre-allocated memory segments or streaming to disk. Make these adjustments before the buffer overloads mid-test, causing you to restart the session entirely. Planning memory usage saves precious minutes.
Don’t Forget to Calibrate
Skipping calibration undermines every measurement. Run through the digitizer’s built-in self-calibration or external calibration with a known reference signal. Doing this routinely ensures that gain, offset and timing errors don’t throw off your readings. Uncalibrated setups often result in false errors or needlessly repeated measurements.
Use Software That Speaks the Same Language
Pair your digitizer with software that integrates seamlessly with your test setup. Look for compatibility with industry-standard environments like LabVIEW or MATLAB. Poor software-hardware integration leads to wasted hours in scripting and troubleshooting. A smooth digital pipeline enhances testing speed considerably.
Minimise Physical Setup Changes Mid-Test
Each cable swap or probe repositioning introduces the risk of error or damage. Plan your setup layout in advance and stick to it. Use labelled channels and document connections clearly. Stability in physical setup means fewer interruptions, faster test iterations, and less scope for confusion.
Document Settings as You Go
Nothing stalls testing like having to guess what the last configuration was. Take the extra minute to document gain, offset, sample rate, trigger settings and cable layout. Many digitizers allow saving configurations, and use this feature liberally. Replication becomes painless, and sharing settings between teams or departments avoids bottlenecks.
If you’re unsure about compatibility or how to interpret complex measurements, it’s worth bringing in a specialist. Missteps at this stage can lead to wasted hours or even damaged equipment.
Contact Genetron Singapore to match your application with the right digitizer, software, and test setup for quicker, error-free signal capture.


Comments